Call of Duty: Modern Warfare 3 | MW3 – Lista de mapas multijugador – Black Ops 3, Call of Duty Maps
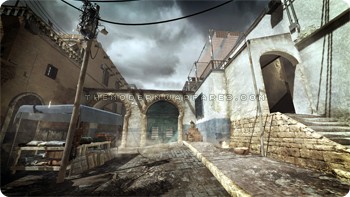
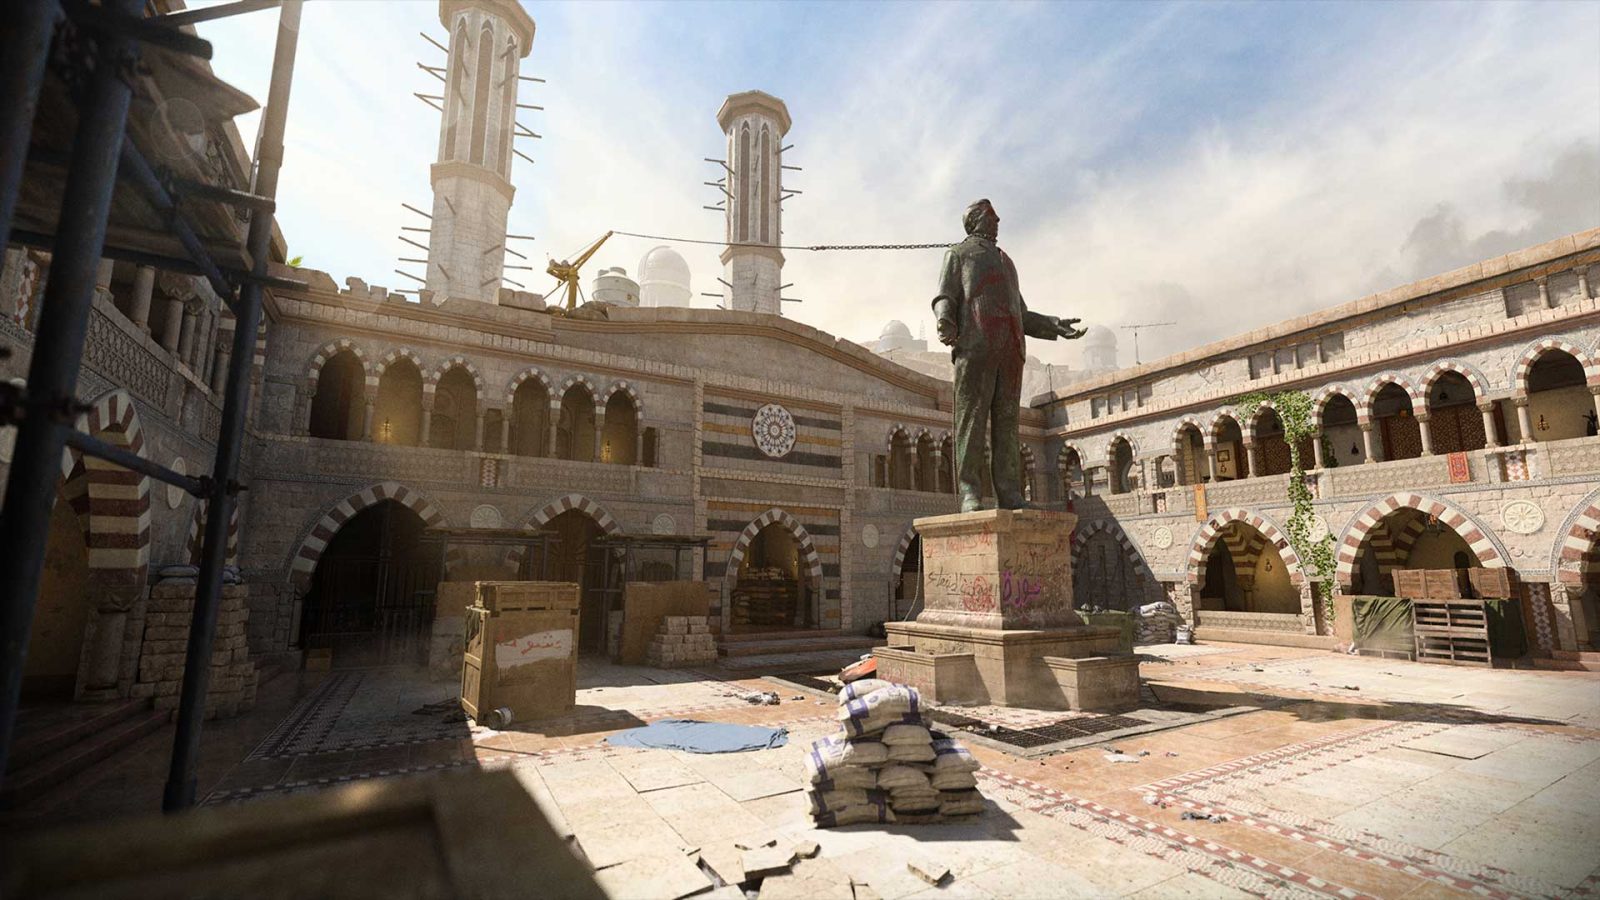
Posicionado en la aldea de Akhdar de Al Mazrah, Showdown, por primera vez en 2007 Call of Duty® 4: Modern Warfare® -Es una experiencia multijugador central de tamaño mediano donde la acción se funnel en un patio icónico y su estatua. . El perímetro ofrece sus propios desafíos, canalizando a los jugadores a compromisos tensos en sus limitados confines. Aquí está lo que necesitas saber: Punto de desove: Kortac
Guerra moderna 3 | MW3 – Lista de mapas multijugador

. .
Hay un total de 4 paquetes de mapa de recopilación de contenido DLC descargable para MW3. Todos los paquetes de mapas fueron exclusivas de Xbox 360 durante 1 mes y los miembros de Elite pudieron jugarlos con 1 semana de anticipación, incluidos los miembros de PlayStation 3 Elite. . Se espera que algunos de los mapas en Bo3 sean remakes parciales de mapas clásicos de MW3.
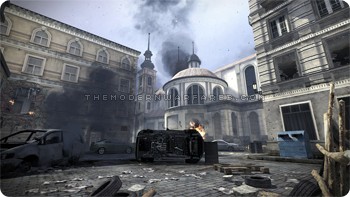
El primer DLC de Warfare 3 Modern Warfare, Content Collection 1, tiene 4 nuevos mapas multijugador: Liberation, Piazza, Overwatch y Black Box. Content Collection 2 tiene 5 nuevos mapas: Sanctuary, Foundation, Oasis, Getaway y Lookout. Colección de contenido 3: Chaos Pack, trae 3 nuevos mapas de cara: intersección, giro en U y vortex. .
Haga clic en el enlace “Más información” para una mejor vista de cada mapa.
Seat drown
. Las calles estrechas traen encuentros agitados y cercanos.
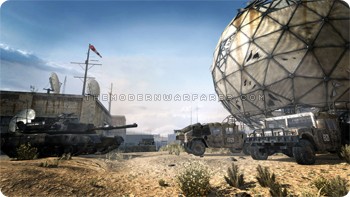
Pequeño avanzada en el desierto. Acción rápida y frenética.
Arkaden
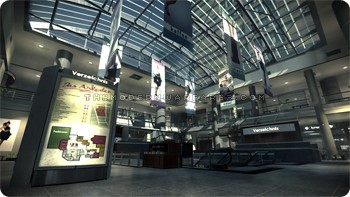
. Intensos juegos de búsqueda y destrucción.
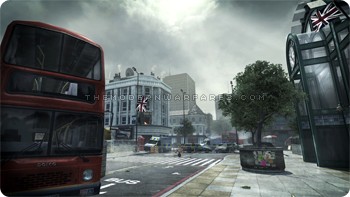
. Combate urbano clásico.
RESISTENCIA
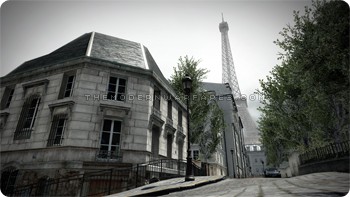
Distrito parisino. Genial para dominar y matar confirmado.
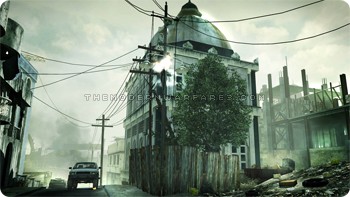
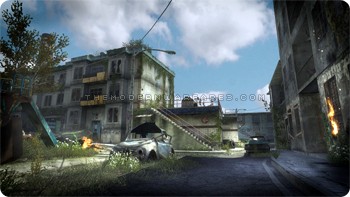
Recesión
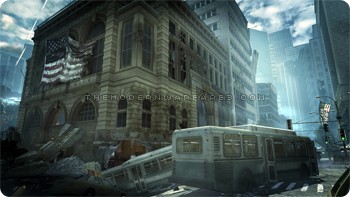
Mapa urbano con calles anchas. Bueno para peleas de alcance largo y corto.
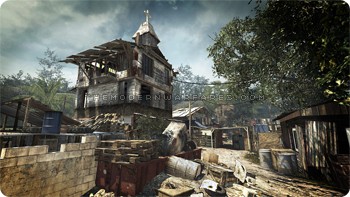
PIRATA

. .
CARBÓN
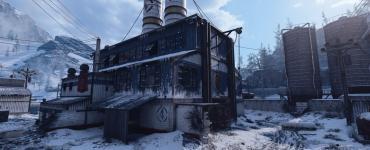
Refinería de tamaño mediano. Ideal para cualquier número de jugadores.
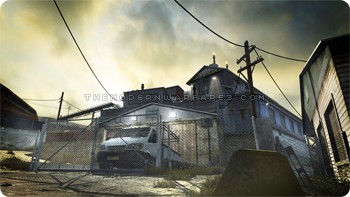
CASCO DE SEGURIDAD
. Acción rápida de trimestre de ritmo rápido.
AISLAMIENTO
Centro de la ciudad europeo. Ideal para el defensor del equipo.
ALDEA
. .
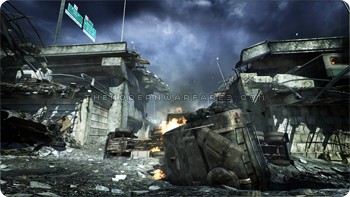
CAÍDO
. Ideal para compromisos tácticos cuidadosos.
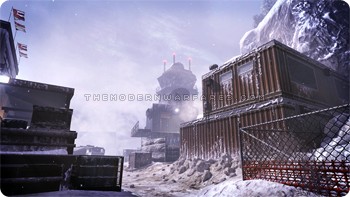
Base aérea siberiana grande. Genial para las grandes batallas épicas.
INTERCAMBIO
Autopista destruida. Ideal para una amplia gama de espacios y estilos.
Pequeña estación de metro. Acción de ritmo rápido tanto por dentro como por fuera.
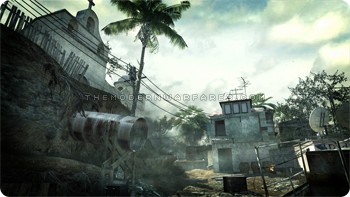
Asentamiento colonial africano. .
Dando la bienvenida a hasta 18 operadores para DMZ y 72 operadores para los modos de juego de resurgimiento. .
Guerra moderna II
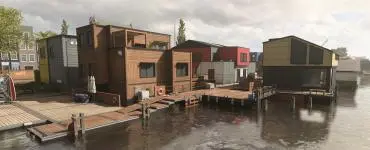
Vondel Waterfront
Las casas flotantes y las vías fluviales presentan múltiples caminos de flanqueo, con las dos posiciones de potencia principales del mapa que se avecinan sobre el centro. Un equipo exitoso deberá equilibrar el control sobre estas posiciones con el uso inteligente de.

El Distrito de Artes Esceninas de Vondel cuenta con tiendas boutique, casas adosadas y una cervecería del vecindario en un área adornada con arte callejero. .
Mercado
El Mercado es una sección de Las Almas despejada para las batallas y las batallas. El combate dentro de esta estructura grande y cubierta será frenética en múltiples niveles, así que prepárese para mantenerse cerca de su dúo o trío, obtener.
Ático
. El ático, situado en el corazón de Chicago, cuenta con una piscina de regazo, una chimenea al aire libre y un interior moderno en ángulo apretado.
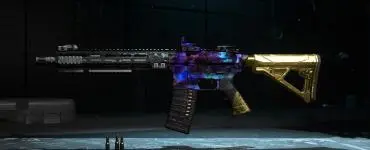
Camufla de arma
. .

Armas secundarias
. .
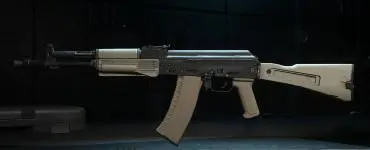
Armas primarias
. Los francotiradores son excelentes para largas distancias, pero regala tu posición con el alcance de la brilla.
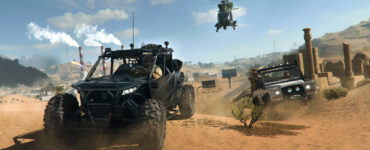
Vehículos
.. Los vehículos requieren gasolina y reparación, encuentren estaciones de servicio dispersas en toda el área de batalla de Warzone. Los barcos también necesitan reparaciones y combustible, encuentre estos lugares alrededor del.
WMD
Intel sugiere que las operaciones de Perseo están girando en una instalación de armas perdidas.
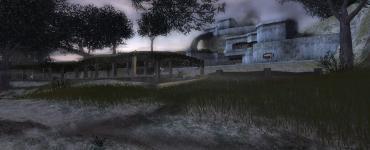
. Los bunkers proporcionan una excelente cubierta y al aire libre abiertos permiten tirados de fuego de mediano alcance.
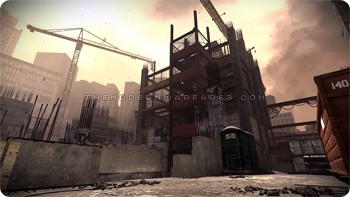
Top inacabado de un rascacielos. .
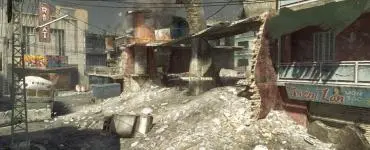
Agrietado
Calles de Vietnam. .
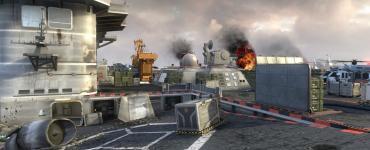
Transportador
Supercarril chino. Compromisos abiertos en la cubierta, con grandes peleas de cuartos en los pasillos.
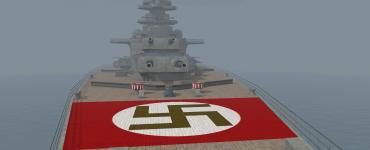
Barco
El barco nazi está en el mar, tome la terraza con rifles o los pasillos con armas de todo el mundo. Mira sobre la cubierta para los campistas.

.
La temporada 4 está a la vuelta de la esquina para Call of Duty: Modern Warfare II y Warzone, y es hora de prepararse para ello. Ya conoces la hoja de ruta para el contenido, Y ahora el blog de Call of Duty ha lanzado algunos consejos excelentes para los próximos mapas. Hay dos en total, enfrentamiento de Cod4 y el distrito de Kunstenaar. Mira el Intel a continuación!
Distrito Kunstenaar – Nuevo mapa multijugador | Call of Duty: Modern Warfare II
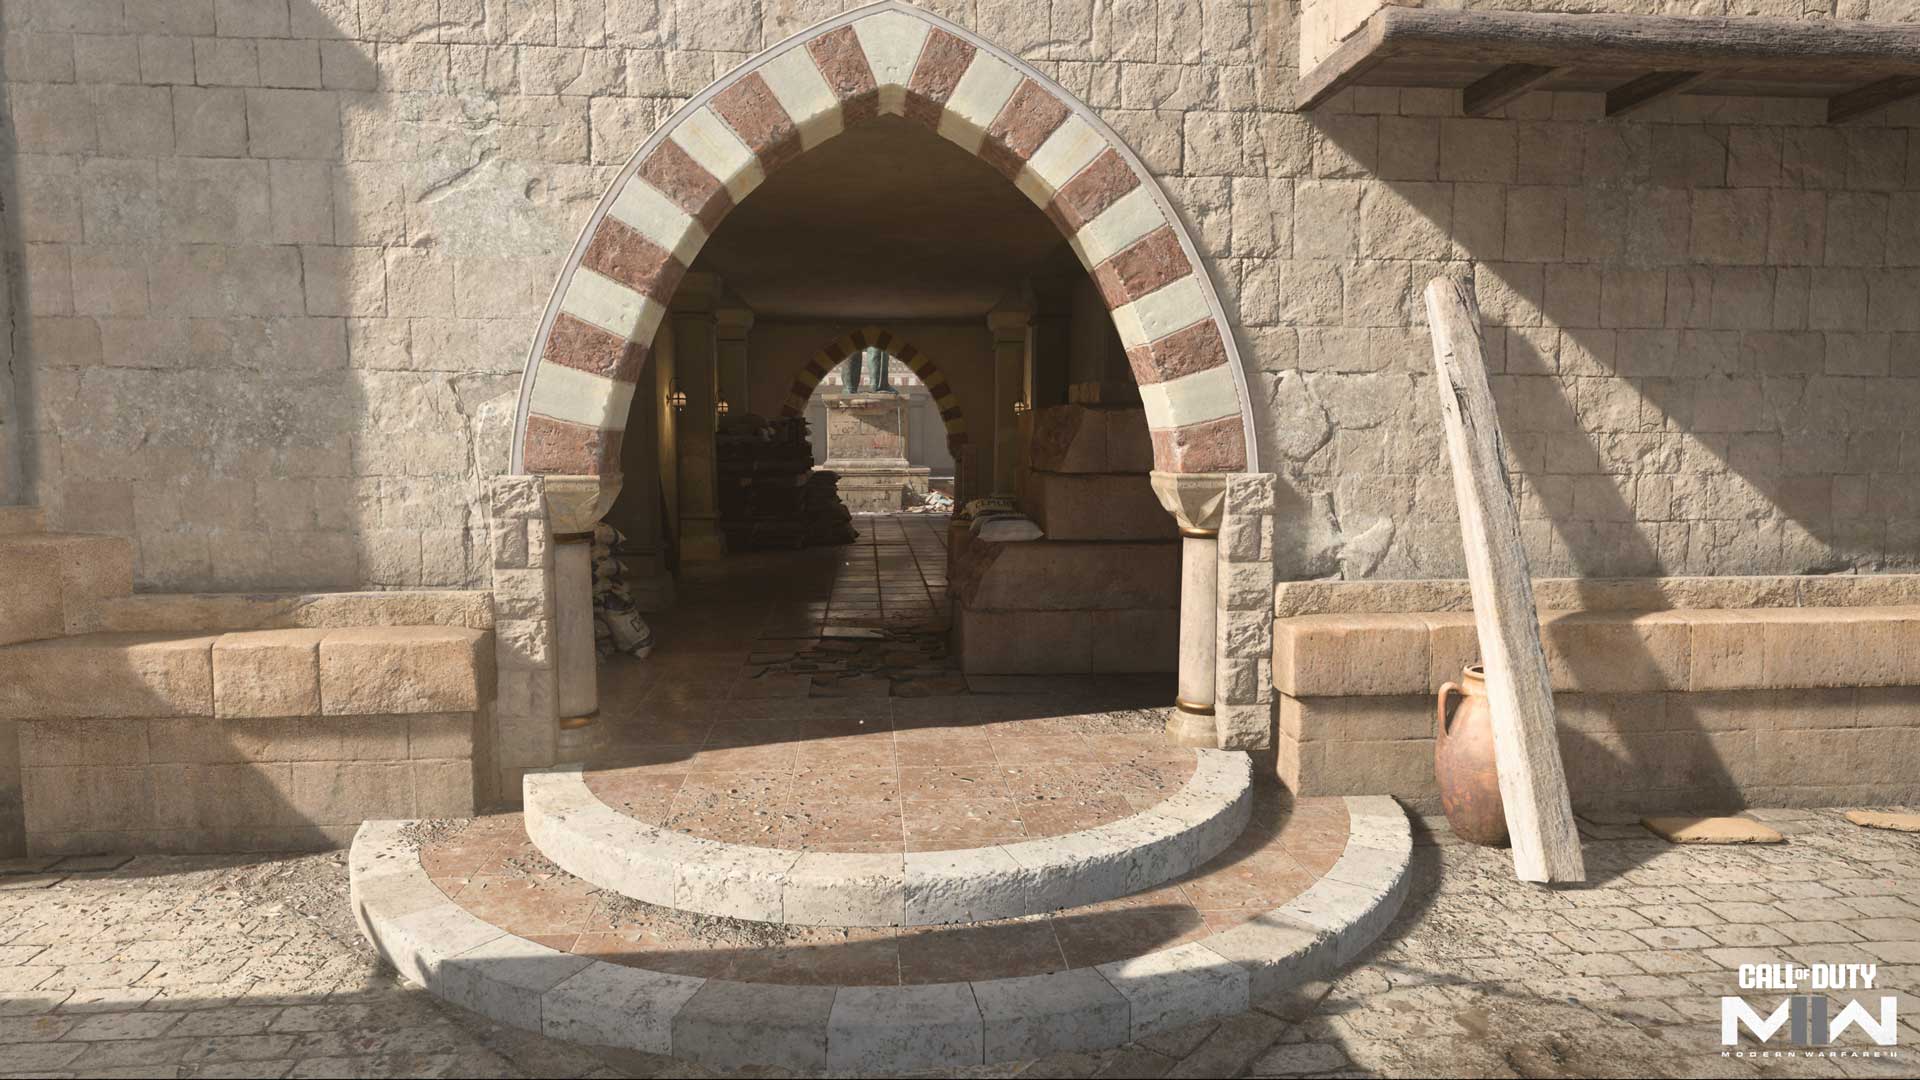
Posicionado en la aldea de Akhdar de Al Mazrah, Showdown, por primera vez en 2007 Call of Duty® 4: Modern Warfare® -Es una experiencia multijugador central de tamaño mediano donde la acción se funnel en un patio icónico y su estatua.
Solo los operadores más valientes, o la mayoría de los locos, intentarán un cruce, con peligro que se avecina por encima y por debajo. El perímetro ofrece sus propios desafíos, canalizando a los jugadores a compromisos tensos en sus limitados confines.
Aquí está lo que necesitas saber:
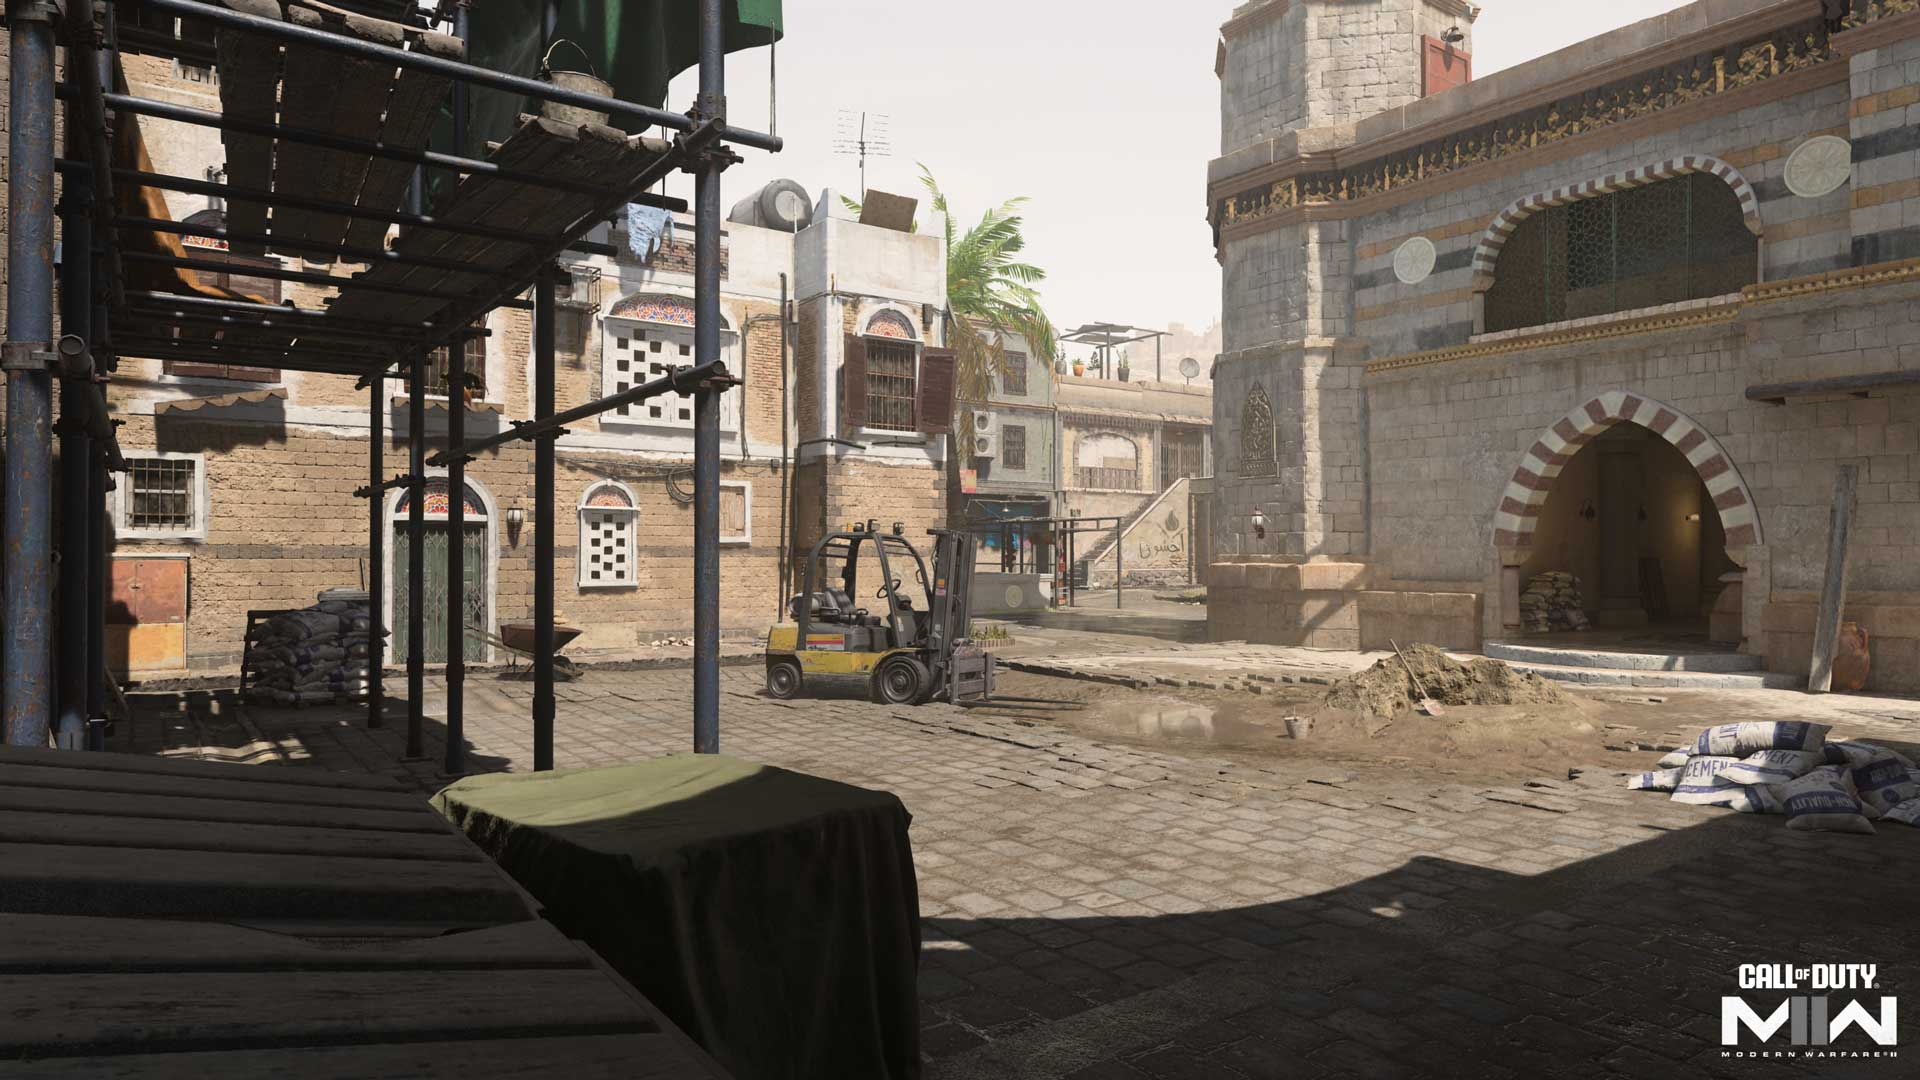
Kortac Spawn Zone (West) – Construcción
. Desde aquí, hay una vista directa a través del túnel oeste hacia el patio. . Dirigirse directamente hacia la estatua central puede ser una trampa de muerte, aunque la arenisca apilada y las paletas de madera en el túnel oeste pueden ser útiles como posiciones defensivas contra las situadas en el otro engendro.
. . Sin embargo, el gallinero obtiene la ventaja está en su entrada lateral hacia la estatua, que puede servir como una ruta de flanco contra los enemigos en el patio.
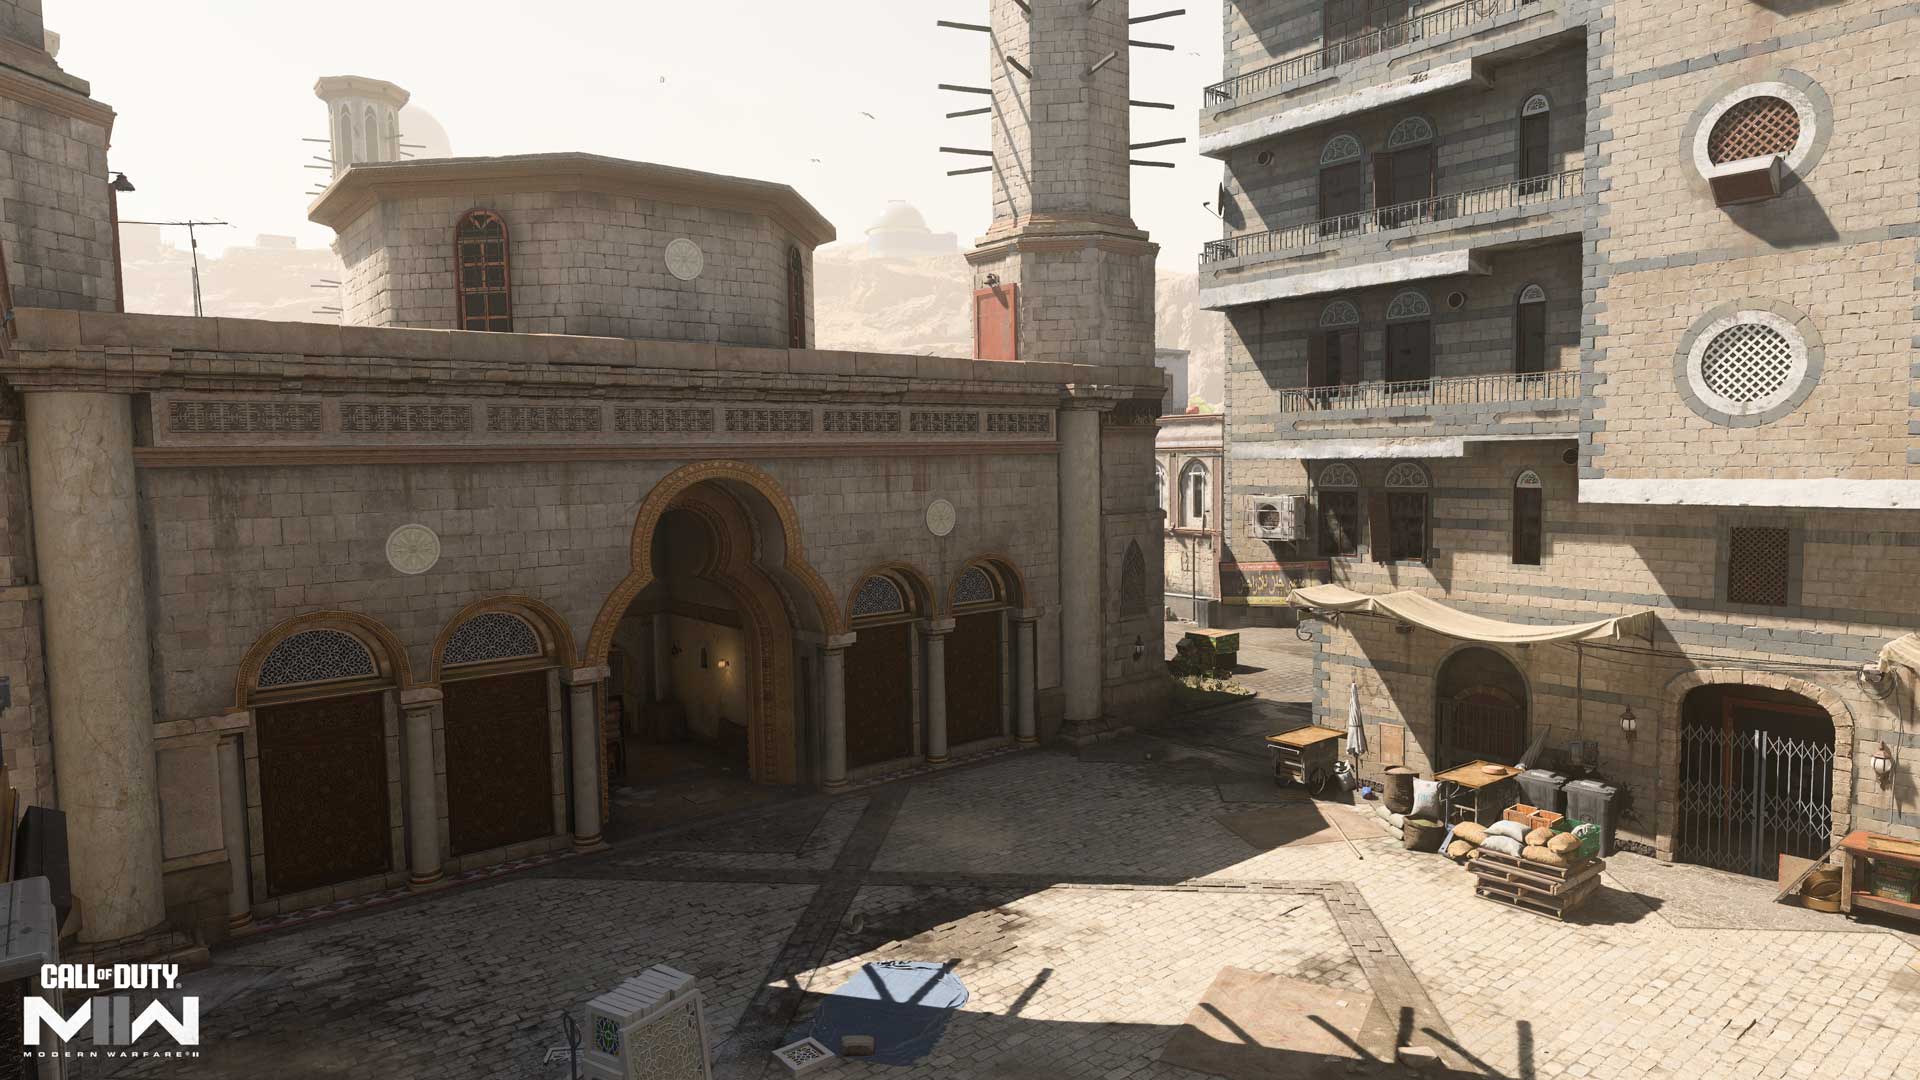
SpecGru Spawn Zone (Este) – Entrada principal
SpecGru ingresa al partido a través de la entrada principal más impecable. Ellos también pueden dirigirse directamente hacia el patio o el flanco alrededor del perímetro. El túnel este presenta algunas opciones de cobertura grandes que se pueden usar para un enfoque más defensivo hacia la estatua.
La ruta de la camioneta del norte está expuesta a líneas de visión más allá de la puerta de metal, aunque es posible subir sobre el vehículo y el manto a la repisa superior, donde tendrá un punto de vista mayor contra los enemigos del otro lado. . . Las escaleras cercanas ofrecen acceso rápido a la segunda historia del patio.
Maniobras de mapas: planificación de rutas

A los fines de esta guía, estamos dividiendo un enfrentamiento en cinco secciones principales:
– Construcción
–
– Entrada principal
– Sendero sur
– Patio
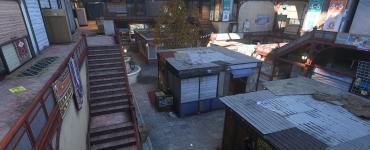
Construcción
La construcción está casi abierta, con solo la carretilla elevadora, las bolsas de cemento y el contenedor de esquina que ofrece cubierta a través de su superficie plana y cuadrada. El mayor desafío aquí es anticipar los ataques enemigos: llegarán por el túnel oeste, los puestos de comida o el gallinero? .
Al sostener el área para un objetivo, solicite soporte para cubrir los flancos izquierdo y derecho para que pueda concentrarse en el túnel central. Si uno de los flancos se incendia, avance para obtener apoyo adicional para concentrar mejor sus defensas.
Camino norte
Para esta guía, el camino norte incluye, de este a oeste, furgoneta, lona azul y puestos de comida. La furgoneta está en su mayoría abierta, con algunos objetos de cubierta dispersos para una defensa adicional. Sus opciones se expanden cerca del vehículo homónimo, ofreciendo un medio rápido para llegar a la sobrecarga de la repisa. Corre a través de las tablas colgantes para cambiar de lado, o correr para que el camino superior se mueva hacia puestos de comida o en los niveles superiores del patio. También hay una entrada de la planta baja en el patio desde aquí, aunque llegar a él te expone a los ataques de enemigos al otro lado de la puerta.
En puestos de comida, la escalera de la esquina y la pared baja en frente del café proporcionan excelentes posiciones defensivas al cubrir el área. Cuando cubra el camino principal a través de la puerta, considere colocar detrás de la caja de plantador blanco con un rifle de francotirador u otro arma de largo alcance en la mano. Para un juego más agresivo, corra por la escalera para disparar a los enemigos desde arriba o para deslizarse en la pasarela superior del patio.
Entrada principal
Aunque no es idéntica, la entrada principal ofrece en gran medida las mismas opciones tácticas que la construcción, con un cuadrado abierto plano y algunas opciones de cobertura menores en todo. Traiga una copia de seguridad al defender el área para ayudarlo a cubrir las tres vías y prepárate para reservarlo para el túnel este si hay rayas aéreas descender en tu posición.
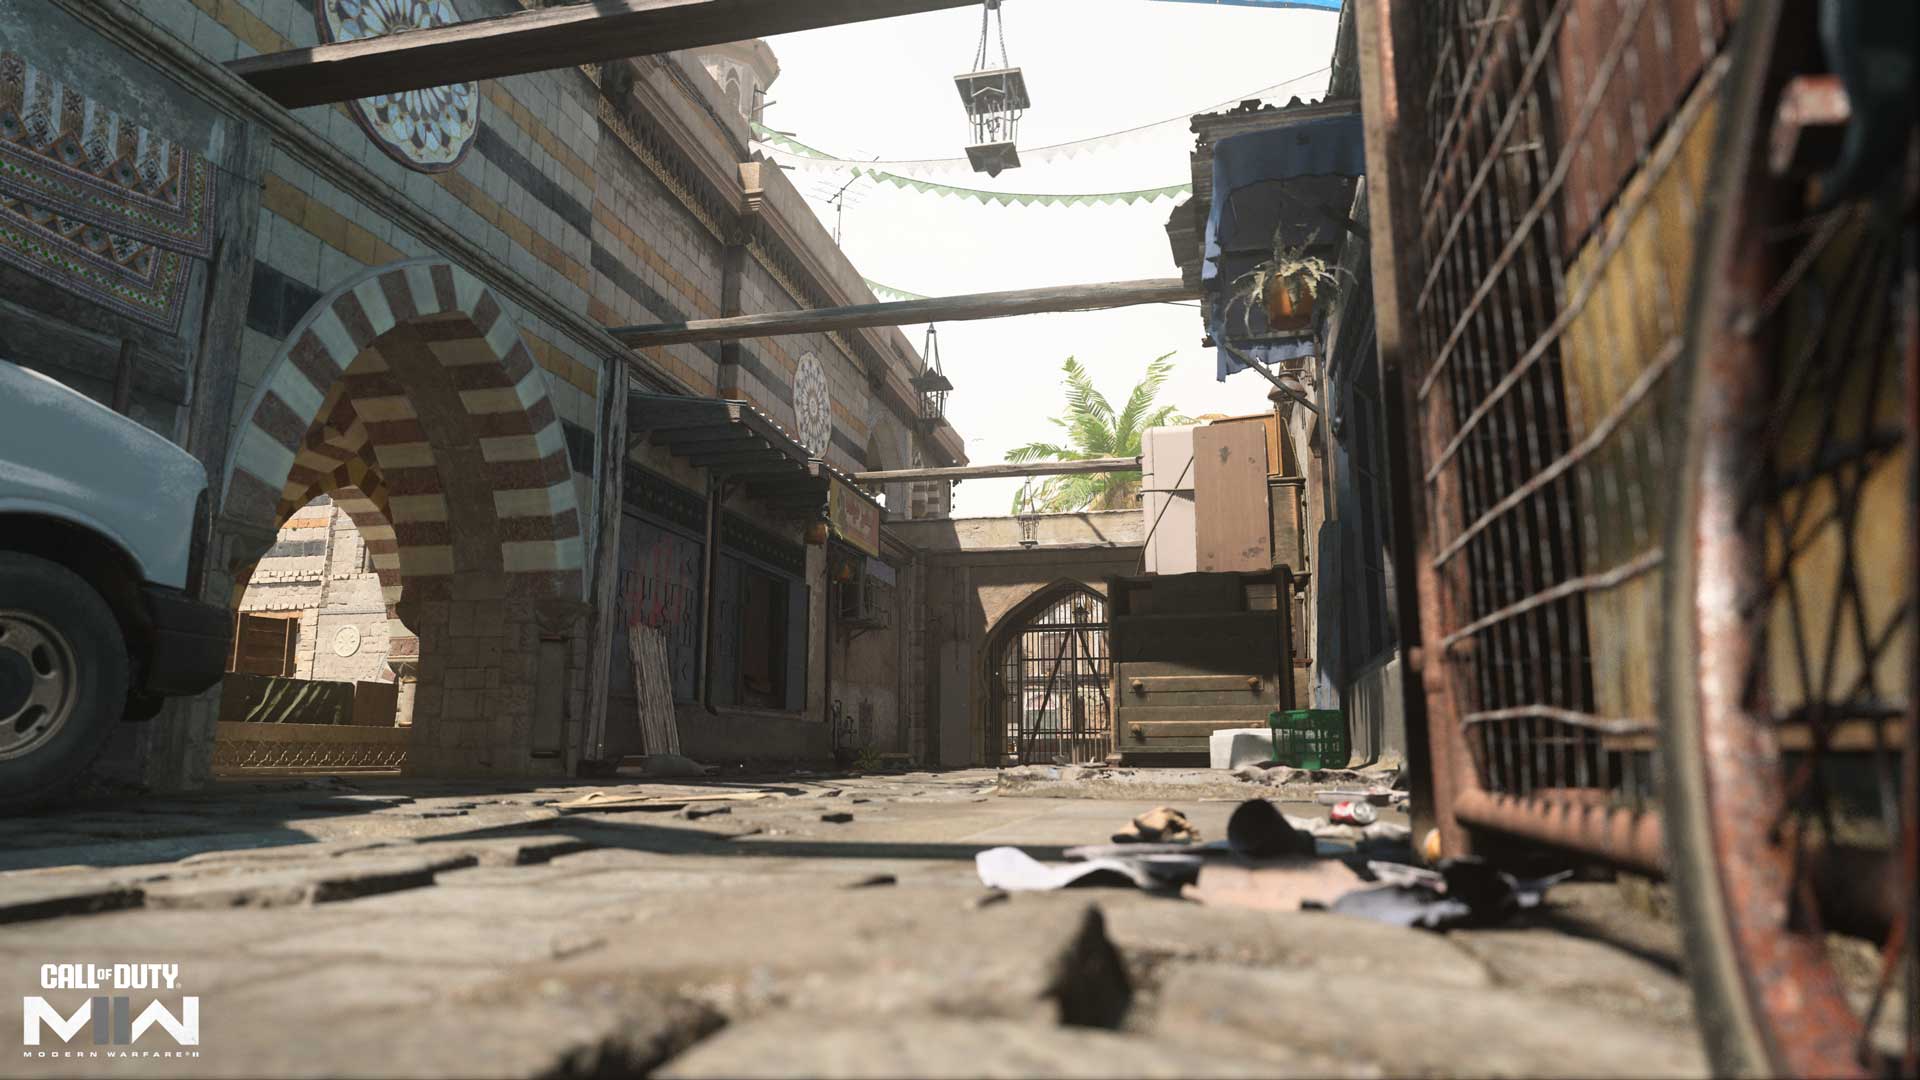
Sendero sur
Que consiste en taller de vidrio, tobogán y gallinero, el sendero sur ofrece los otros medios para cruzar el mapa fuera del patio. Aunque los objetos de cubierta son escasos, la larga caja de plantador en la tienda de vidrio ofrece una defensa sólida al involucrar a los enemigos aquí, mientras que el andamio de esquina ofrece una ventaja de altura pero poca cubierta. Tenga en cuenta la plataforma de madera debajo de la repisa del sudeste del patio: esta es una posición sólida desde la cual emboscarse en los enemigos entrantes.
La escalera de piedra ofrece una ruta directa para pasar. Desde aquí, puedes saltar al nivel del suelo o dirigirte al patio inferior. También puede subirse a los toldos de madera a lo largo del borde del mapa inferior para mantener la verticalidad. La diapositiva ofrece un poderoso punto de vista sobre el gallinero.
Patio
En el centro muerto del mapa, el patio con su estatua central ve algunas de las acciones más intensas en el partido. Las pasarelas circundantes presentan peligros a cada paso, pero cuando necesita cruzar el mapa rápidamente, es tentador correr el riesgo. Con una combinación de la recolección de Intel a través de las comunicaciones y la asistencia de UAV, además del uso judicial de la portada disponible, es posible pasar por aquí, pero su tiempo tiene que ser impecable.
Cuando se trata de las pasarelas circundantes, prepárate para luchar por tu posición en el codiciado nivel superior. Con un punto de vista sobre la estatua, más las vistas sobre los caminos norte y sur, es un área poderosa. Sin embargo, con cuatro puntos de entrada que conducen al nivel superior, siempre debes estar en guardia, preparado para asumir enemigos que intentan usurpar tu posición.
Rutas y rotaciones objetivas
Modo Intel: dominación
Al principio, espere una acción seria en el sendero sur mientras los equipos luchan para atravesar la apertura sur del patio hacia la bandera B. Los túneles este y oeste probablemente también verán niveles de acción similares; Considere llevar las escaleras a la pasarela superior, que es una posición de potencia buena, aunque ligeramente expuesta,.
Aunque las banderas A y C están en extremos opuestos, el mapa es lo suficientemente pequeño como para que uno o dos operadores agresivos puedan empujar hacia el otro lado, mientras que el resto del equipo está comprometido con la bandera B por estatua. Esto ayuda a quitar la presión del patio mientras el enemigo recurre para retomar su bandera perdida. Una vez que eso sucede, tomar la bandera B se vuelve más factible.
Modo Intel: Buscar y destruir
Buscar y destruir cambia la dinámica en un enfrentamiento con ambos sitios de bombas colocados a lo largo de la pasarela superior hacia el norte y el sur. Con solo una vida por ronda, es importante dominar las cuatro entradas al piso superior: las escaleras que conducen desde la planta baja en las esquinas del suroeste y noreste, así como las dos pasarelas externas sobre las puertas de metal que conducen directamente a la parte superior piso.
Como equipo atacante, considere avanzar agresivamente mientras envía un portador de bombas, y potencialmente un guardaespaldas para ayudar, arriba para plantar. ..El alcance de 5x de aumento puede ayudar a sacar el portador de bombas independientemente del sitio para el que van.
Modo Intel: Hardpoint
Showdown tiene seis puntos duros, con cada uno ubicado en una ubicación significativa fuera del patio central. Sin embargo, definitivamente habrá tráfico peatonal aquí a medida que los jugadores tomen la ruta más corta posible al siguiente objetivo.
Vale la pena luchar por una posición a lo largo de la pasarela superior del patio; Debido a que hay dos ubicaciones de punto duro aquí, así como dos puntos duros por parte de las puertas de metal, ciertamente es un área de potencia para bloquear. .
.
Consejos
. Explore el perímetro primero. Si bien los peligros abundan en todas partes, el perímetro de lucha es generalmente más enfocado y predecible. Una vez que esté familiarizado con el diseño, comience a moverse hacia las pasarelas centrales y explorar el medio.
. Cuidado con las rayas aéreas. Aunque los cielos son claros, la estructura que rodea el patio ofrece una gruesa cubierta superior contra las rayas aéreas entrantes, así que tenga en cuenta su tiempo o tendrá dificultades para encontrar un objetivo.
3. Tiempo de inactividad, ¿qué es eso?? . Recuerde que el intercambio a su pistola siempre es más rápido que la recarga, y proporciona una potencia confiable cuando necesita hacer el interruptor.
. Tiro de truco colgante de la repisa. Vea esos tableros de arriba a lo largo de la lona azul norte? Con un salto de precisión, puedes activar una repisa colgar de ellos, atrapando a los oponentes entrantes desprevenidos. Estás bastante expuesto en esta posición, así que no te excedas.
5. Granadas a la pasarela superior. .
6. La herramienta adecuada para el trabajo. La versatilidad es muy útil al sostener la pasarela superior sobre el patio. .
. Ataque de pinza. .
8. Ahora intenta encontrarme. Los fumos, las granadas y la actualización del campo, pueden ser útiles para ocultar los movimientos, especialmente en el patio. Solo tenga en cuenta las vistas térmicas o los movimientos predecibles que pueden contrarrestar esta estrategia.
9. Si no está roto, no lo arregles. Esta versión de Showdown es muy fiel a su diseño original, aunque además de las mejoras gráficas masivas desde entonces, la mecánica de movimiento actualizada agrega una nueva capa de estrategia. Use sus habilidades de manteca, especialmente alrededor del perímetro, para superar a sus enemigos rápidamente y use la diapositiva para detenerse cuando se prenden fuego.
10. Toma tus habilidades para Cañón de guerra. Comenzando a sentirse seguro después de varios partidos? Considere cambiar a Cañón de guerra y dirigiéndose a la aldea de Ahkdar Poi en Al Mazrah. Usa las habilidades que obtuviste en el modo multijugador para bloquear el área mientras luchas para ser el último equipo de pie.
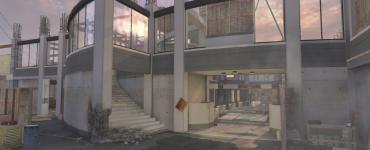
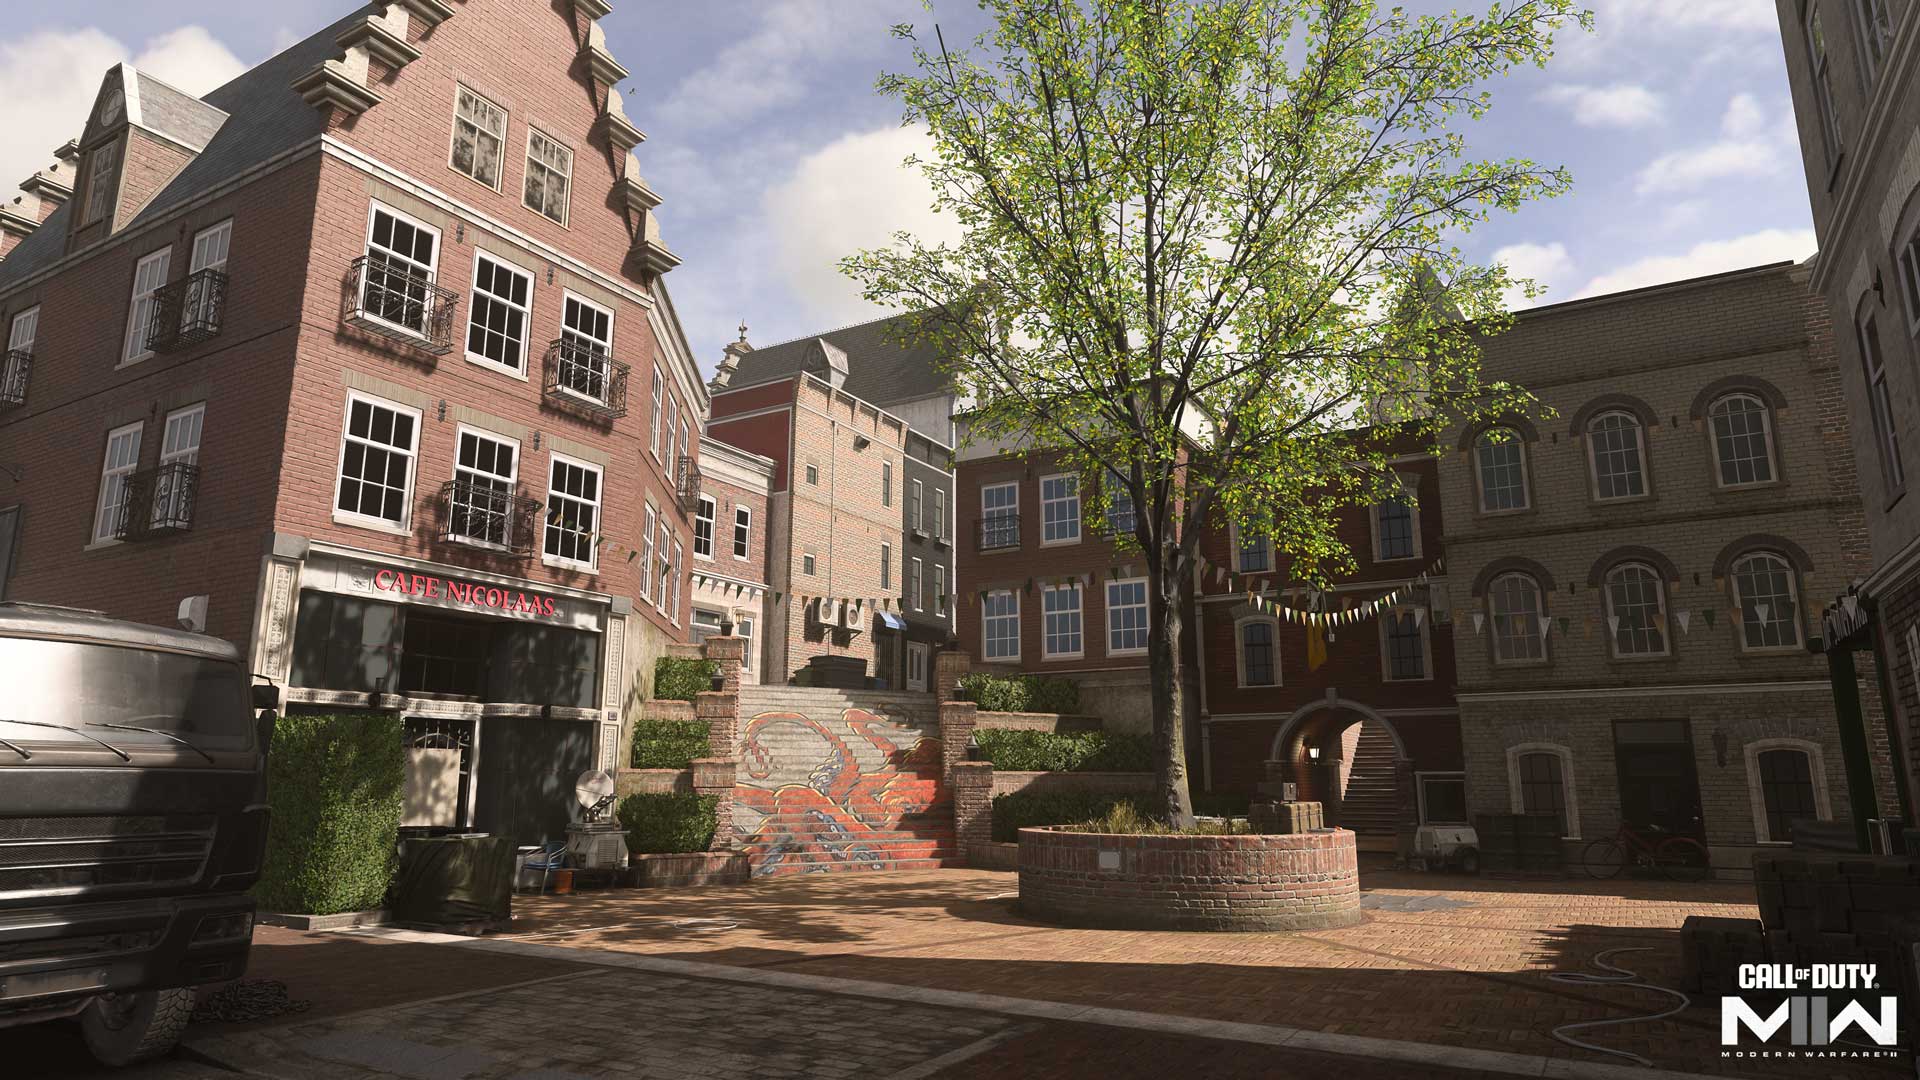
Distrito de Kunstenaar
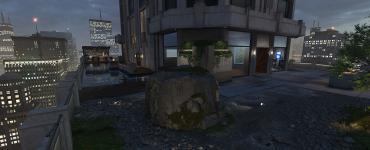
Bienvenido al Distrito de las Artes de Vondel – La nueva temporada 04 Call of Duty®: Warzone ™ Mapa: un mapa multijugador de 6V6 núcleo ubicado al oeste del museo y a través del agua desde el estadio y la estación de policía.
. Con un mapa puntuado por pequeñas ubicaciones interiores, los operadores tienen abundantes opciones para tejer dentro y fuera de sus carreteras principales, con oportunidades de combate cercano, mediano y largo.
Punto de desove: Kortac

Kortac Spawn Zone (South) – Back Alley
Comenzando en el callejón de atrás, las fuerzas de Kortac tienen acceso a tres rutas delanteras: oeste a través de la tienda de ropa de ropa de calle hacia el canal y el punto de control, directamente hacia la plaza, o hacia el este hacia la entrada del parque y a través de las camionetas.
En general, tomar el camino medio presenta el mayor peligro, ya que la plaza está en desventaja contra los enemigos colocados en la parte superior de las escaleras. Por lo tanto, es posible que tenga más suerte subiendo camionetas en el este o, al moverse por el camino occidental, nadar en el canal hasta que pases de la plaza y las escaleras.
Punto de desove: SpecGru

.
Cabeza directamente a través del conector hasta la parte superior de las escaleras para un punto de vista fuerte contra las fuerzas de Kortac que se mueven hacia arriba a través de Plaza y Western Riverside. Al tomar el camino oriental a través de la construcción, tenga en cuenta la caída repentina en el camino más allá del camión de la cama plana, esto podría oscurecer su vista de enemigos que se dirigen hacia su posición. Considere establecerse junto a la ventana del sur de la casa, cortarlos a medida que alcanzan su nivel. .
Maniobras de mapas: planificación de rutas

A los fines de esta guía, estamos dividiendo el distrito de Kunstenaar en cuatro secciones principales:
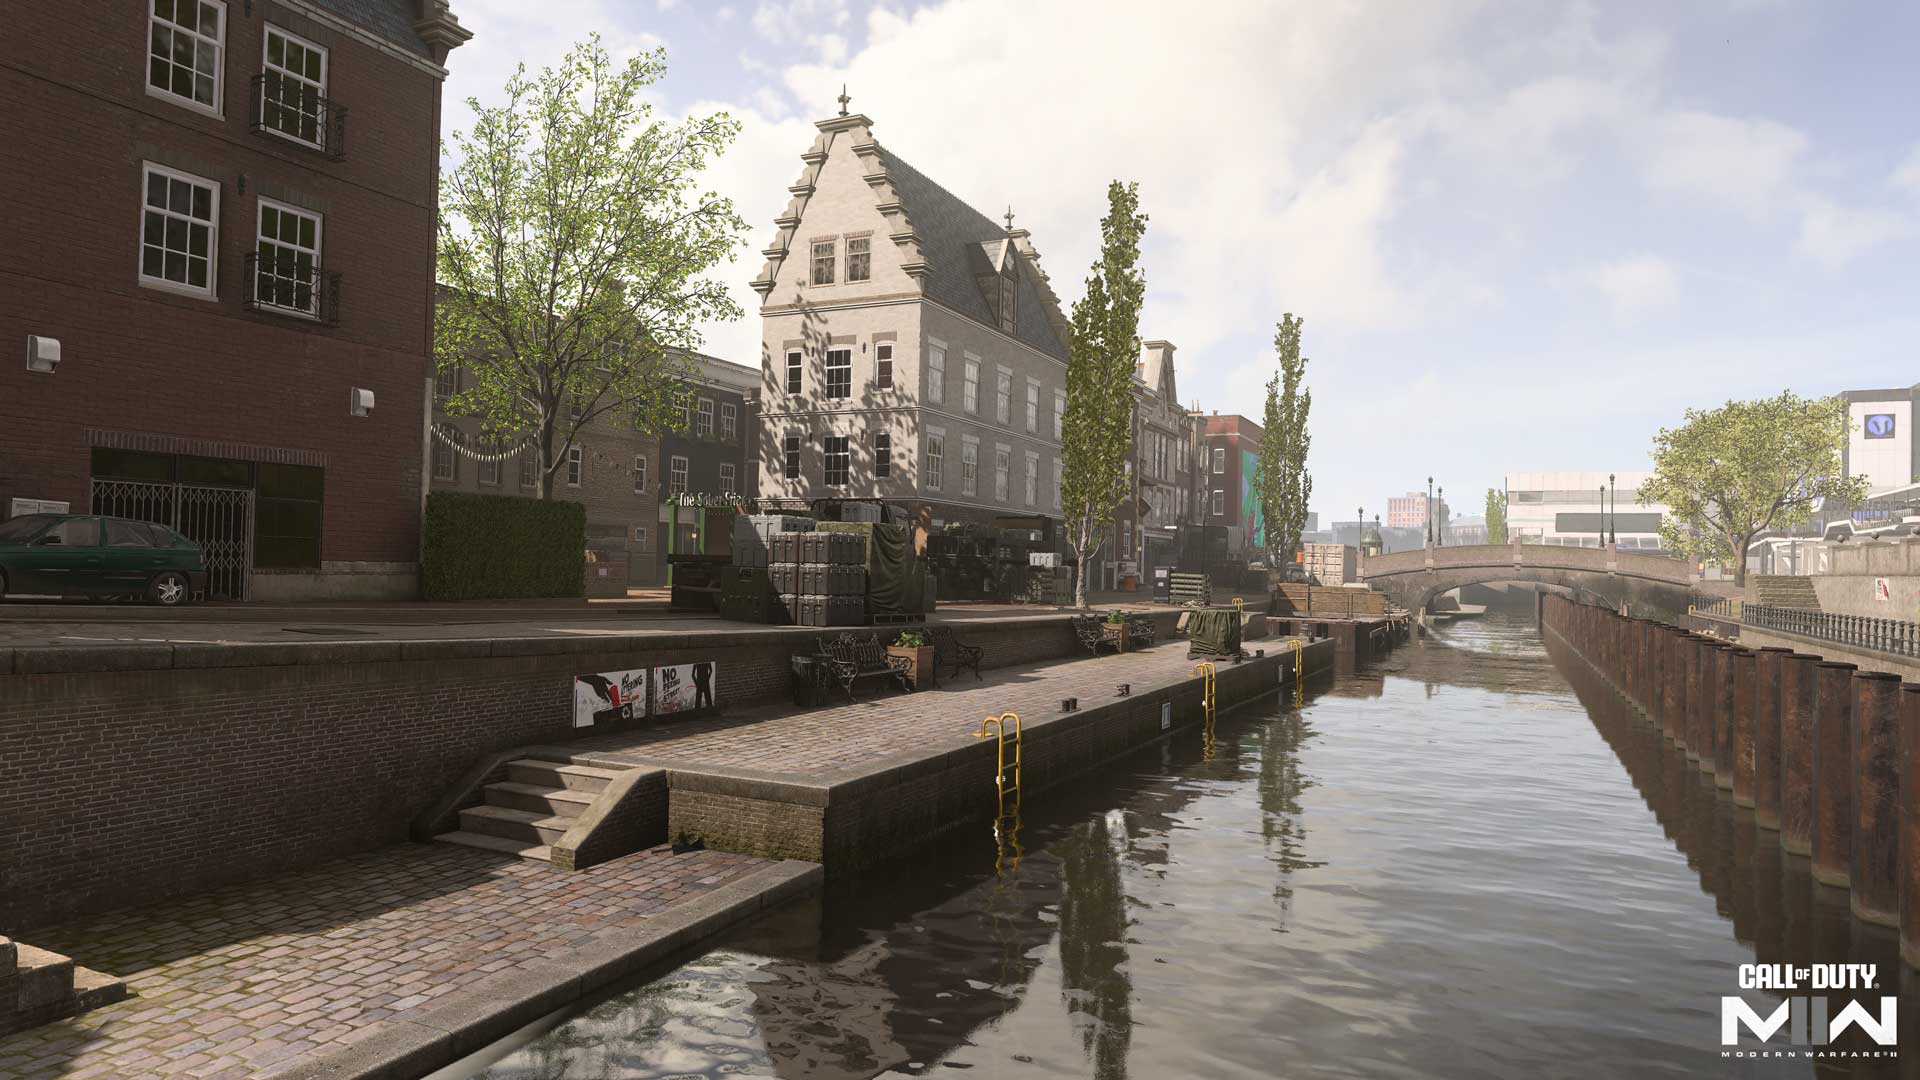
Canal
–
Tiendas
Lado del parque
. Para aquellos que buscan cerrar la distancia, varios vehículos grandes ofrecen una cobertura sustancial y un medio para levantarse y sobre el nivel de la calle para una vista más dominante. .
. Como se mencionó anteriormente, nadar a través del canal te mantendrá fuera de la vista, pero también te retrasará.
Residencial
Compuesto por la mitad norte del mapa, incluida la carretera principal detrás de él, el área residencial se encuentra a una elevación más alta en comparación con su contraparte del sur. Los compromisos medianos gobiernan el exterior, favoreciendo los rifles de asalto a lo largo de la carretera y los SMG a medida que se acerca a la parte posterior de la casa. Tenga en cuenta que el camión plano estacionó a lo largo de la pared aquí; Los barriles atados a él proporcionan una buena cobertura contra los enemigos que se mueven desde la plaza.
. Cuando las rayas aéreas vienen a llamar, espere que estas áreas se conviertan en zonas calientes.
Finalmente, la posición de poder que ofrece las escaleras seguramente llamará la atención. Úselos, luego continúe antes de convertirse en un objetivo de alto valor. .
Tiendas
El área de Southern Shops embomate los operadores en compromisos estrechos a través de sus callejones exteriores y los espacios interiores de ropa y lavandería. Con menos piezas de cobertura, las peleas aquí están determinadas con mayor frecuencia por quién tiene el sorteo más rápido, así que sea agresivo.
No descuides la utilidad del sobrio Restaurante Fray cuando ataca la plaza central. Aunque puede sentirse expuesto, ofrece una valiosa cobertura parcial contra los operadores enemigos del otro lado. Al defender el área, la lavandería y la ropa de calle también se convierten en caminos dignos; Úselos para cambiar rápidamente su posición entre los carriles intermedios y externos.
Aunque los disparos largos también son una preocupación, y una oportunidad, aquí, el camino en ángulo de la carretera hace que sea menos preocupante en comparación con el camino largo y plano a lo largo del canal. Aún así, hay mucho peligro que se puede encontrar aquí, con varias vías que conducen abruptamente al área desde el camino medio, así como vehículos colocados constantemente y otros grandes objetos de cobertura para oscurecer la vista de los enemigos entrantes.
Use el límite del museo aquí, que le permite llegar al nivel de la calle. Si bien está más expuesto de esta manera, también le da una vista más clara en el futuro. En el extremo norte del camino, la escalera de piedra ofrece una excelente vista sobre la carretera. Al defender contra los enemigos que entran por el medio, considere establecerse en una de las áreas de hierba plana, reduciendo sus posibilidades de ser vistos por enemigos a lo largo del camino.
Rutas y rotaciones objetivas
. Si su escuadrón se agrupa con demasiada fuerza, el riesgo de ser flanqueado es alto, por lo que se extiende al cubrir los objetivos para aumentar su conciencia del peligro entrante. Si te encuentras con una resistencia feroz en un carril, cambia a otro, siempre empujando una apertura en defensa del enemigo.
. Sin embargo, no seas demasiado rígido sobre en qué banderas centrarte; cualquiera de los dos lo harán, y en un mapa pequeño como este, es probable que los objetivos cambien de manos a menudo.
Modo Intel: Buscar y destruir
Reduzca la velocidad en buscar y destruir y permanecer especialmente cauteloso con los francotiradores enemigos utilizando las largas líneas de visión del mapa para obtener una eliminación temprana en el partido. El subterfugio puede ser mortal aquí: abre fuego, arroja granadas o obtenga la atención del equipo enemigo mientras establece un flanco para eliminarlos mientras responden a la ubicación específica.
Las posiciones del sitio de la bomba enfocan la lucha en las carreteras externas, y su proximidad a la plaza central hace que sea tentador cruzar el área abierta. . Si nota las puertas abiertas o ventanas rotas al pasar una ubicación interior, tire una granada dentro de la vez y aproveche los muchos vehículos grandes que se mueven encima de ellos para una vista mayor para una vista mayor.
El punto duro de apertura deletite el caos desde el principio, enviando a ambos equipos a la volátil Plaza Central. . Una vez que el punto duro es suyo, recuerde que solo necesita un operador adentro para acumular puntos; El resto del equipo puede extenderse para cubrir mejor las múltiples vías que conducen hacia el objetivo.
Vaya a moverse a la siguiente ubicación objetivo antes de que se agote el punto duro actual, especialmente entre los puntos duros del segundo y el tercer y el cuarto y el quinto, cada uno requiere una mayor distancia de viaje entre ellos. Lleve un lanzador, o esté dispuesto a cambiar a una carga que tenga una, para responder a las rayas aéreas enemigas, particularmente a UAVS. .
Consejos
1. . El diseño del distrito de Kunstenaar tiende a canalizar la batalla a lo largo de sus tres carriles verticales principales de compromiso, aunque puedes atrapar al enemigo desprevenido enfocándose en un estilo de juego más horizontal, moviéndose entre los tres carriles para mantener a raya al enemigo.
2. Navegar un poco. Puede pensar que los espacios interiores abarrotados son en su mayoría útiles para pasar, pero no tengan tanta prisa por llegar al otro lado. Use las ventanas y puertas disponibles para buscar y eliminar a los operadores cercanos; Luego mueva una vez que la costa esté despejada.
3. Ir a pescar. Sospecha que hay un operador enemigo que nadan en el agua, pero no tiene tiempo para esperar a que salgan al aire? . El canal es lo suficientemente estrecho como para tener una oportunidad decente de conectarse si alguien está allí.
4. . Las vías restringidas aquí son ubicaciones principales para ataques terrestres, ya sea en forma de Claymores, minas de proximidad o minas de supresión. .
5. . Debido a la popularidad de las escaleras, puede apostar que habrá mucho movimiento a través de la pequeña sala de conector justo al norte de la misma. Si el enemigo se aferra a esta posición, abre camino hacia la habitación y saluda a los operadores entrantes con una explosión de escopeta.
6. . .
7. . Con solo unas pocas ubicaciones interiores dispersas, las tiendas y la casa pueden estar llenas rápidamente cuando las rayas aéreas obligan a los operadores en interiores. Esté preparado para luchar por la cubierta superior en estas situaciones, ya sea que seas el que sale de las rayas o espera que los enemigos corran para escapar de la tuya.
. . Wheelson-HS es una racha formidable aquí, considerando la facilidad de moverse a través de las carreteras exteriores del distrito. Los vehículos estacionados también ayudan a mantener la máquina obstruida mientras se acercan a las posiciones enemigas.
9. . Incluso en una batalla acalorada, hay momentos inevitablemente tranquilos, ofreciendo la oportunidad perfecta para apreciar el arte callejero circundante. Vea el pulpo sobre las escaleras, el perro en la plaza y una variedad de otros en todo el distrito.
10. Desplegar en Vondel. El distrito de Kunstenaar proporciona solo una muestra del lanzamiento del mapa de Vondel Greater en la temporada 04 de Cañón de guerra. Tome su escuadrón y diríjase al partido para ver los terrenos del museo al lado, así como los muchos otros puntos de interés, lo que conforma este nuevo campo de batalla.
Estén atentos a la tendencia de juegos para más llamadas del deber: Modern Warfare II y Warzone News and Info!